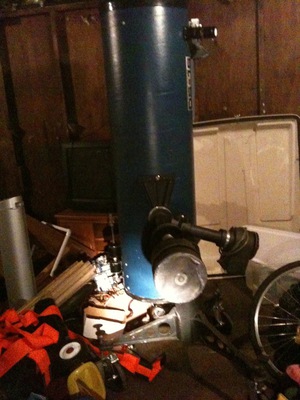
Last year, I picked up a Meade DS-16. It was a large, bulky telescope of early 80s vintage. Using it was like wrestling with a dead elephant; it had a clock drive for tracking RA, but no fine controls at all, so aiming it precisely was very difficult. On top of that, the tube didn’t rotate at all, so it was really easy to get the telescope into impossible positions. When the telescope was pointing south, it was very difficult to look through the eyepiece. I had to stand on a stool and the mount to be able to get a look through it, because using a ladder didn’t help at all (the ladder got me higher, but it didn’t really get me any closer).
This was not an ideal situation, but it was tolerable until the thing fell on me while I was taking it out of the garage. I escaped serious injury, but decided enough was enough. It was time to convert the beast to a Dobsonian that would be easier to use and that I’d be able to take to Mt. Rainier or Mt. St. Helens.
Before
After

Below the fold are more pictures of the Dob at different stages of building, and some discussion of how I built it.
There are a lot of guides out there on the Internet on how to build a Dobsonian telescope, so I won’t go into super great detail there. You can google around and find a lot of helpful hints and instructions on how to build a Dob yourself, and they’ll be better than what I can do. I mostly just stared really closely at pictures of other people’s Dobs anyway to figure out what to do, but there’s a lot of help available out there.
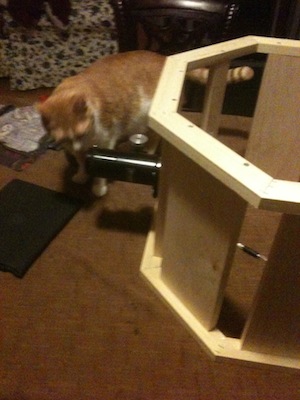
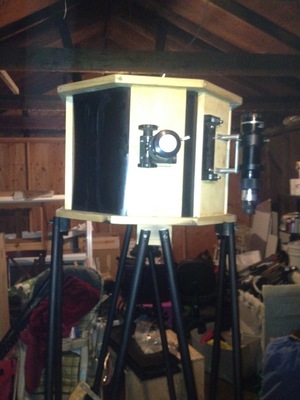
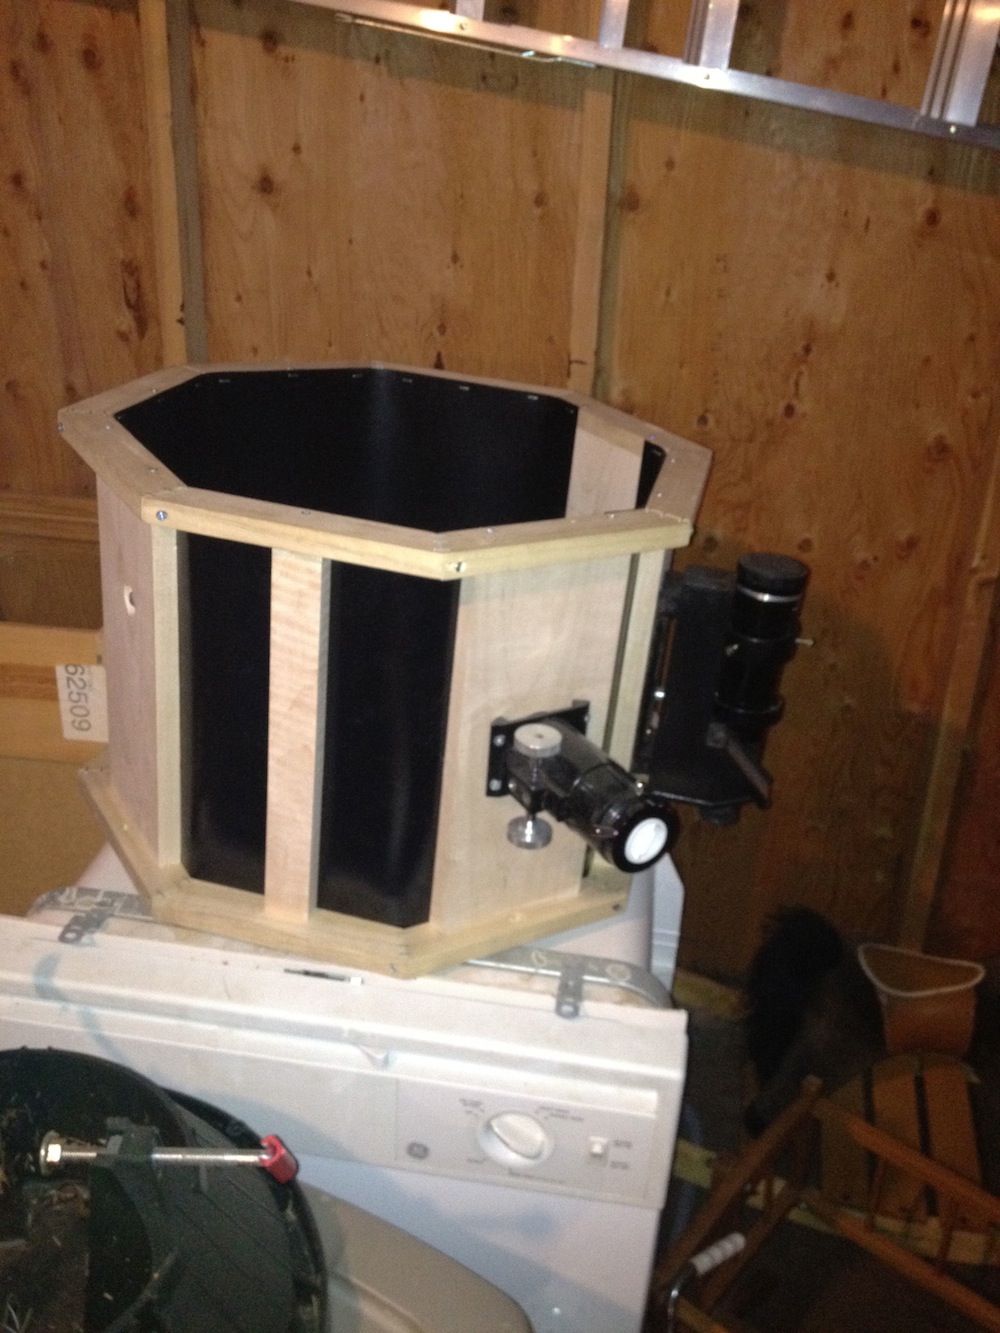
That said, the first thing I started on was the upper tube assembly, or UTA. I initially tried making rings for the top and bottom there, but I didn’t have a router and my efforts with the jigsaw were… less than perfect, so I ended up making an octagon for the UTA.
The octagon was probably not the best design for the UTA, but it works well enough. A bigger problem was deciding that I should make the support beams on the UTA out of maple (the octagon part was poplar). I figured “Hey, maple is nice and strong, that’ll be really nice for it.” Unfortunately I didn’t realize how heavy maple is, so it caused some really bad balancing problems once everything was put together. I ended up removing most of those pieces of wood, and carving out as much as I could out of what was left. You can see the evolution of the UTA in these pictures below:
Partially Assembled
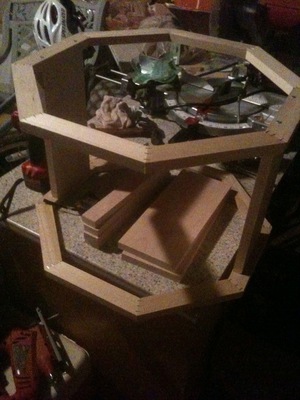
The (originally) Finished Product
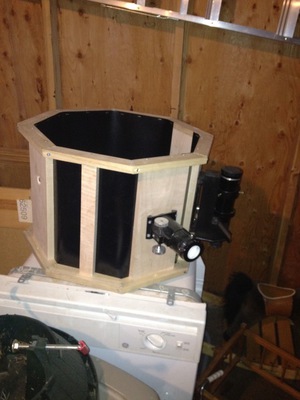
A Couple of Views of the UTA After Removing Most of the Maple Pieces

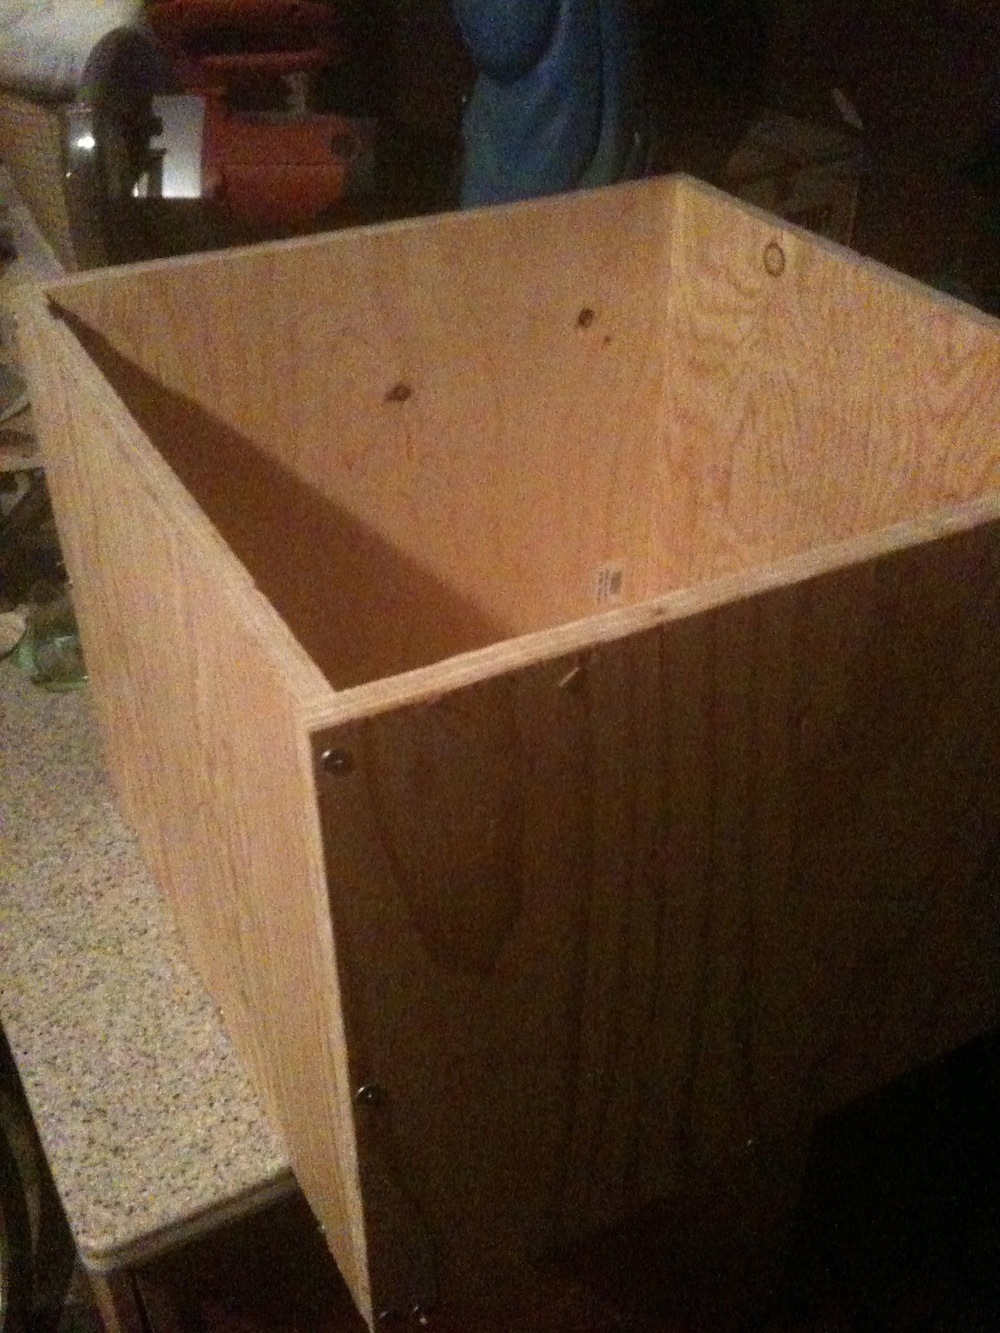
Building the mirror box was easier, though. It is, at the end of the day, just a box like any other. My task there was simplified by the fact that I was able to take the mirror out of the old tube along with its cell and just plunk it in after drilling some holes in the bottom of the box.

I did, however, add handles, a lid, and some feet to the box.

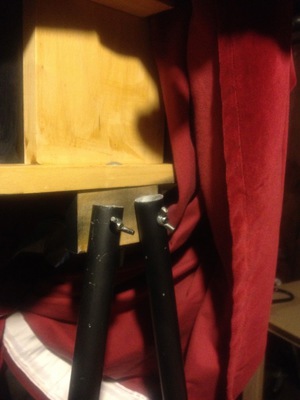
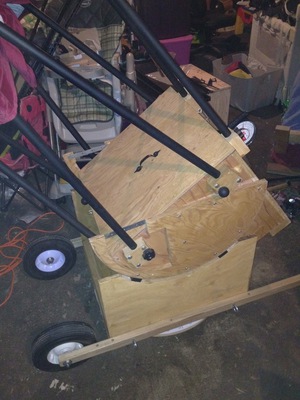
Strangely, I didn’t take a whole lot in the way of pictures of making the side bearings and rocker box. That’s pretty straightfoward though. I had decided to put the maple split blocks on the outside of the box, so in the picture below you can see how I cut out a place in the bearing for the block. This did not end up being the final arrangement for the bearings, however; later I had to adjust their angle a bit, along with moving the HDPE blocks’ position a bit. Normally Teflon is recommended for the bearings and pivot surfaces, but I was able to find HDPE more easily. For the undersides of the bearings and the rocker box, I just used scrap Formica from a place that does countertops.

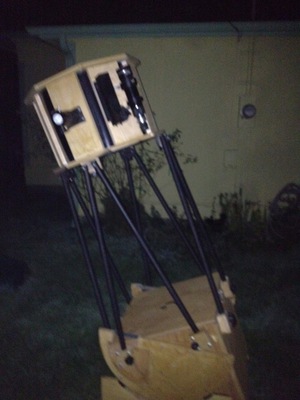
Here, most everything is assembled. The trusses have been cut, the rocker box and mirror box are all together, the rotating base is set up, and the UTA and mirror box are connected. The UTA has the focuser, Telrad, and finder scope from the old telescope attached as well. The inside has not been painted at this stage and the outside has not been stained, nor have the optics been added yet.
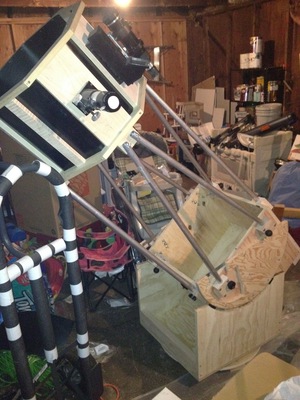
Making the maple split blocks for the bottom was pretty straightforward, but it took me longer to figure out a good way to attach the trusses to the UTA. There are much better systems for it out there, but what I settled on was bolting the trusses to a piece of wood, and then bolting that to the UTA. I’ve never been entirely happy with doing it this way, but it has at least worked fairly well even if it isn’t very elegant.
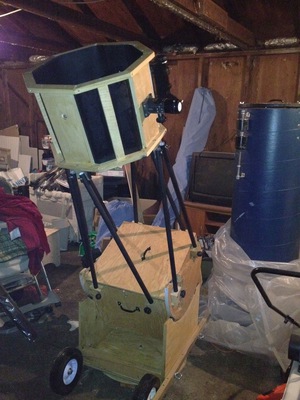
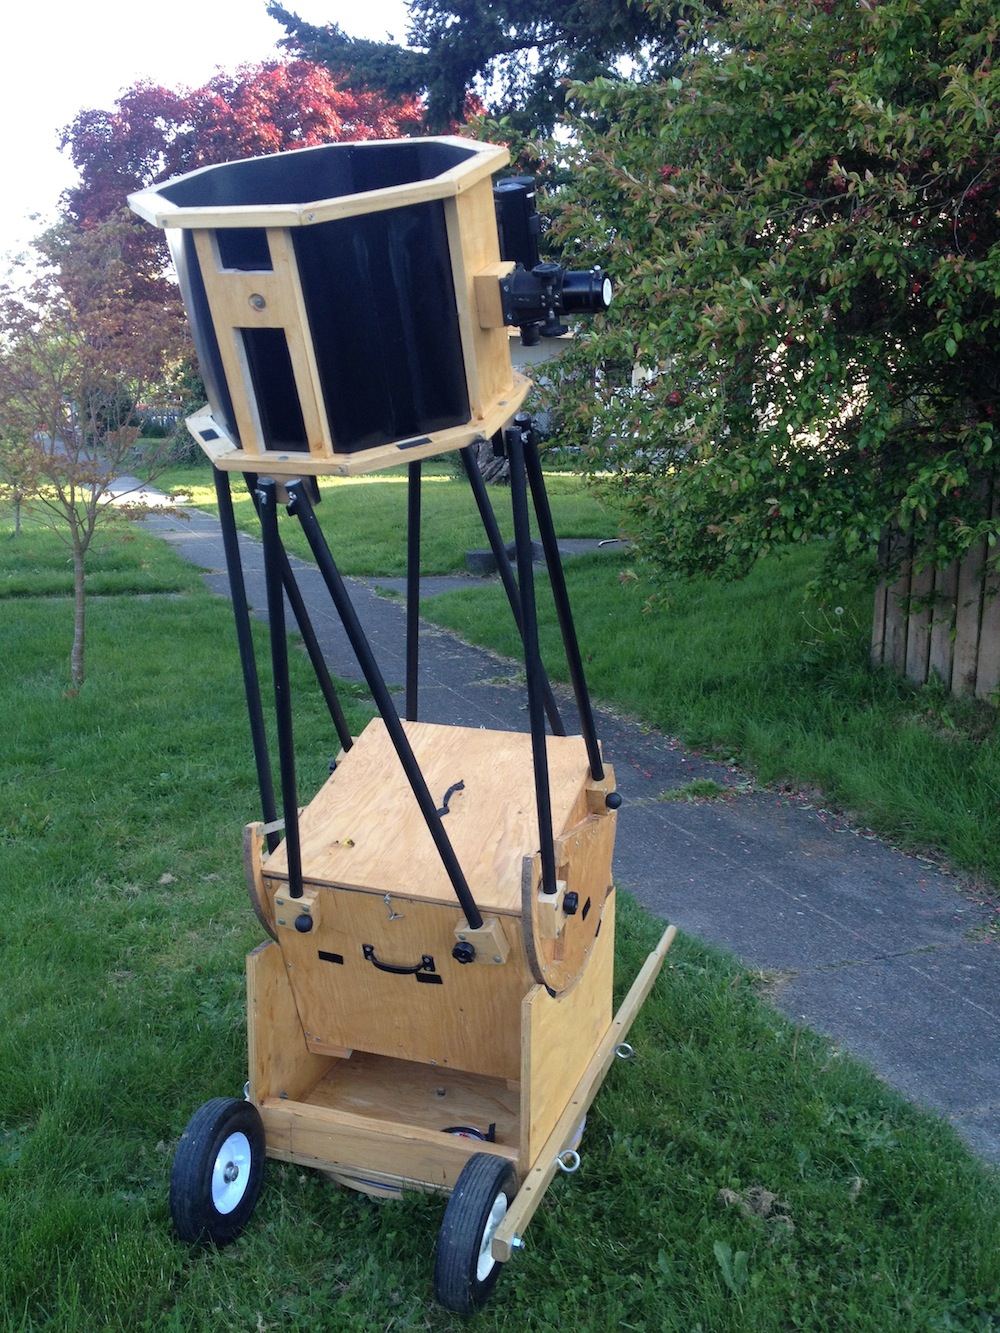
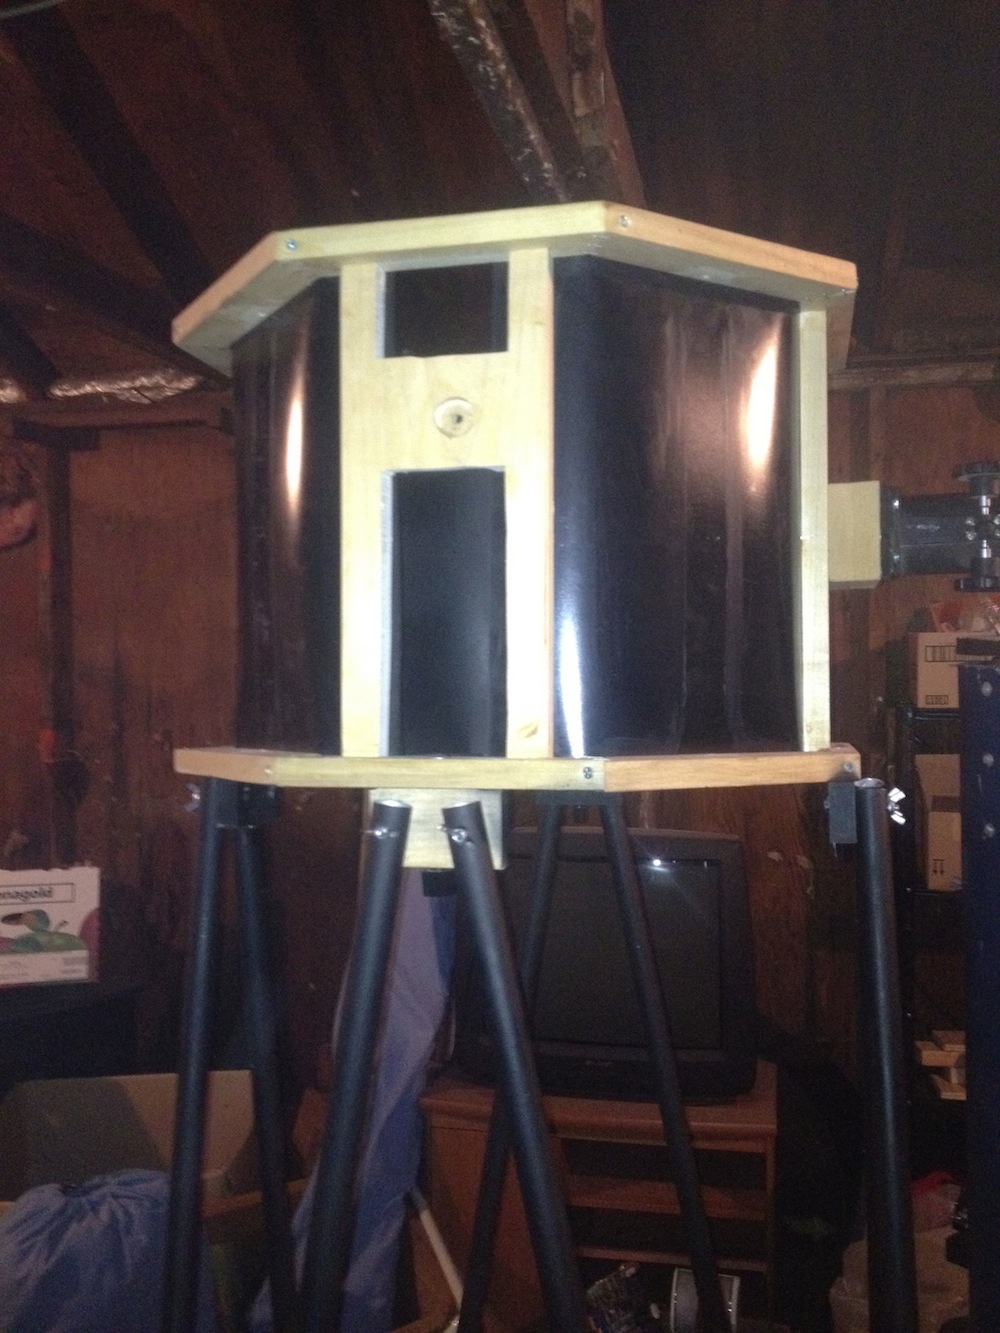
Here it is finally fully assembled, stained, and painted, with the optics installed and ready to go. The wheelbarrow handles are also attached for easy moving.
And here’s right before first light with the new Dobsonian design:
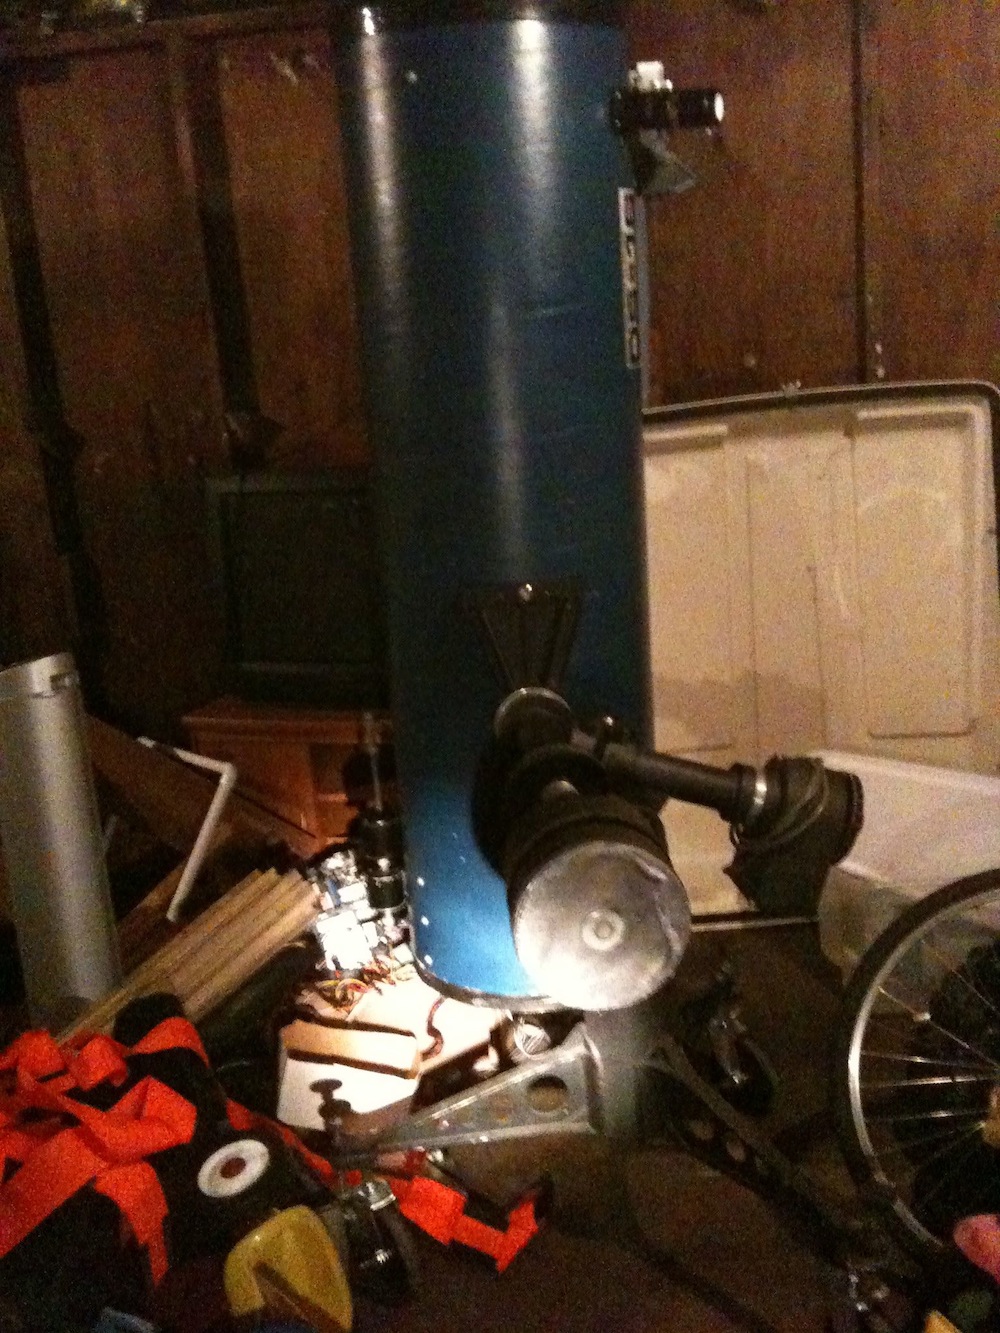
Even though I could look through the telescope, I wasn’t really done. There were both improvements I wanted to make to it and failings that I had to fix. As mentioned above, I had to remove many of the maple pieces to make it balance better, and I had to adjust the angle of the side bearings a bit. The original focuser I had taken off of the Meade was sticking to itself and decided to strip out all of its teeth in the focuser’s gear, which obviously made it unusable. I had to get another focuser for it, but that one was a bit shorter than the previous one, so I ended up having to drill out one of the extra maple blocks and attach it to the UTA so the focuser could be further out. This was another not ideal situation.
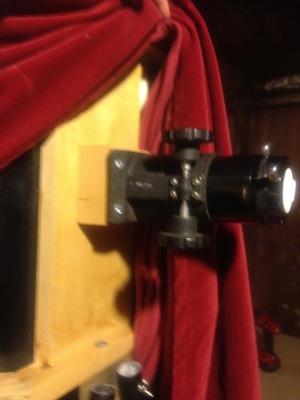
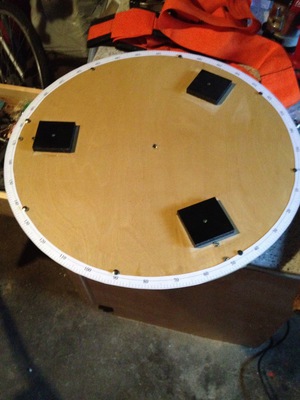
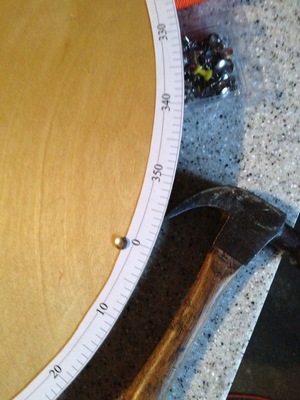
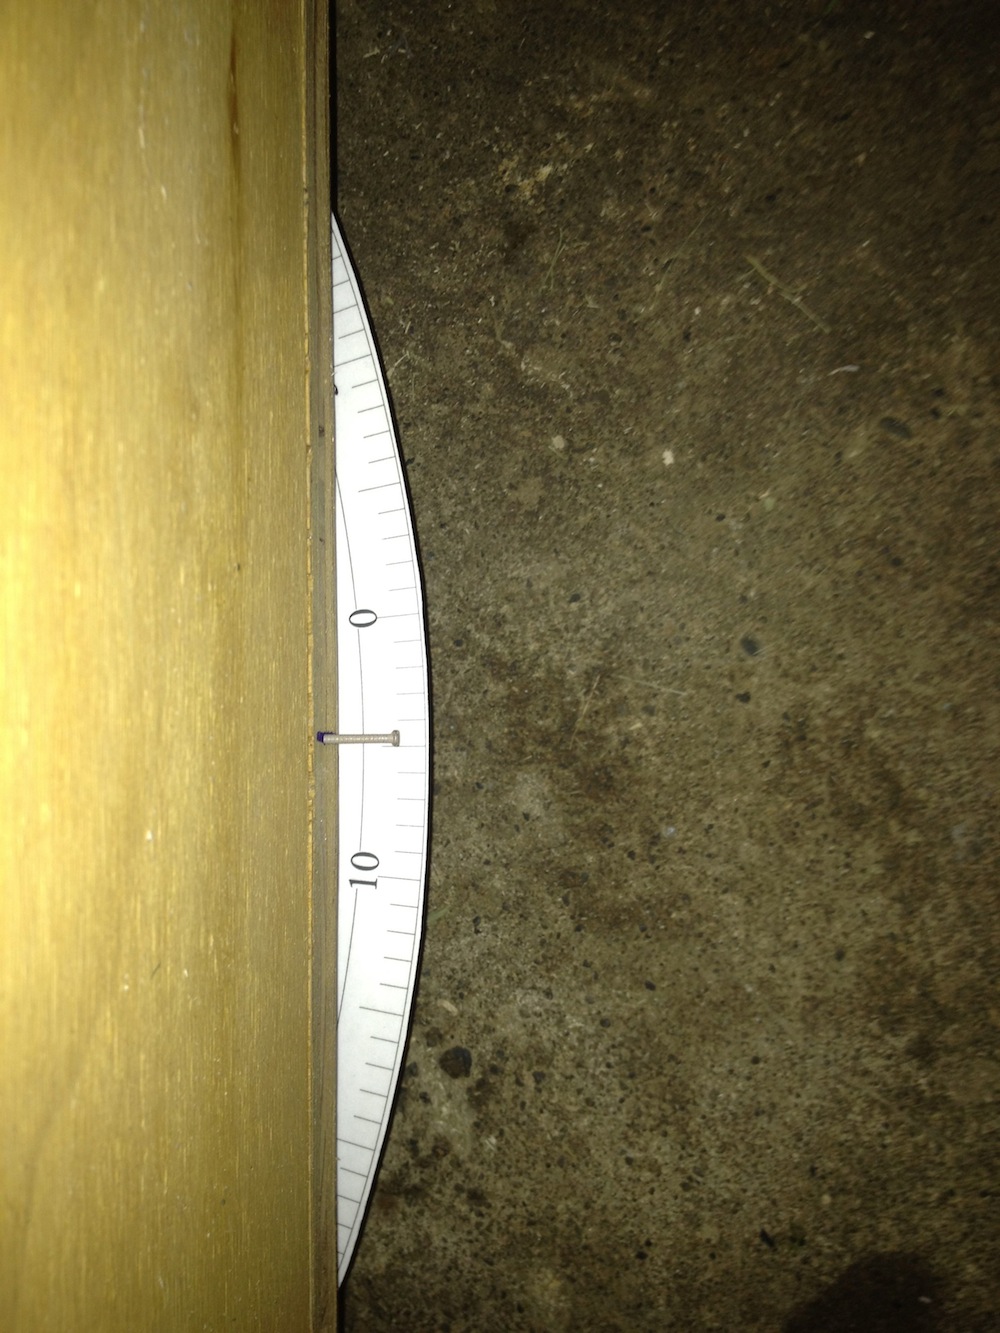
An actual improvement I made, though, as opposed to fixing a screwup with the design, was adding the azimuth circle to the bottom. Getting it made was a little bit of a headache, because printing out 24” wide circles isn’t all that easy. I used www.settingcircles.com to create the circle (it costs money, but it worked well), and went to Kinko’s to print out and laminate an A1 sheet with the circle on it (although as I recall I was able to cut the sheet down a bit to at least make laminating it a bit cheaper than doing the whole sheet). Then I cut the circle out, used thumbtacks to keep it in place on the bottom pivoting part, and put a small nail on the side of the rocker box to show where the telescope is pointing. Now, I can set the telescope up, point the telescope at some prominent star, adjust the azimuth ring as needed, and after that I can use azimuth coordinates. To go along with this, I picked up an inclinometer and stuck that to the mirror box as well, so I can get an idea of the altitude. It’s not as precise as I can get it with the azimuth ring, but it works well enough.
The nice thing, I think, about this design is that it lets you find objects (or at least get in their general area) with the alt-az coordinates you can get from a star chart app like SkySafari, yet there’s no mechanical parts to break, or batteries to lug around. I think there’s something to be said for a telescope without electrical parts, although I think I’m in the minority there.

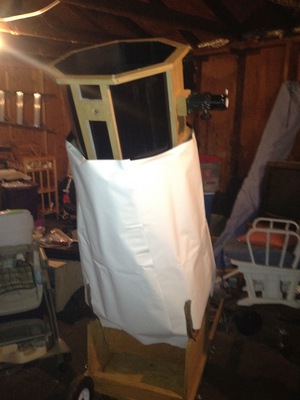
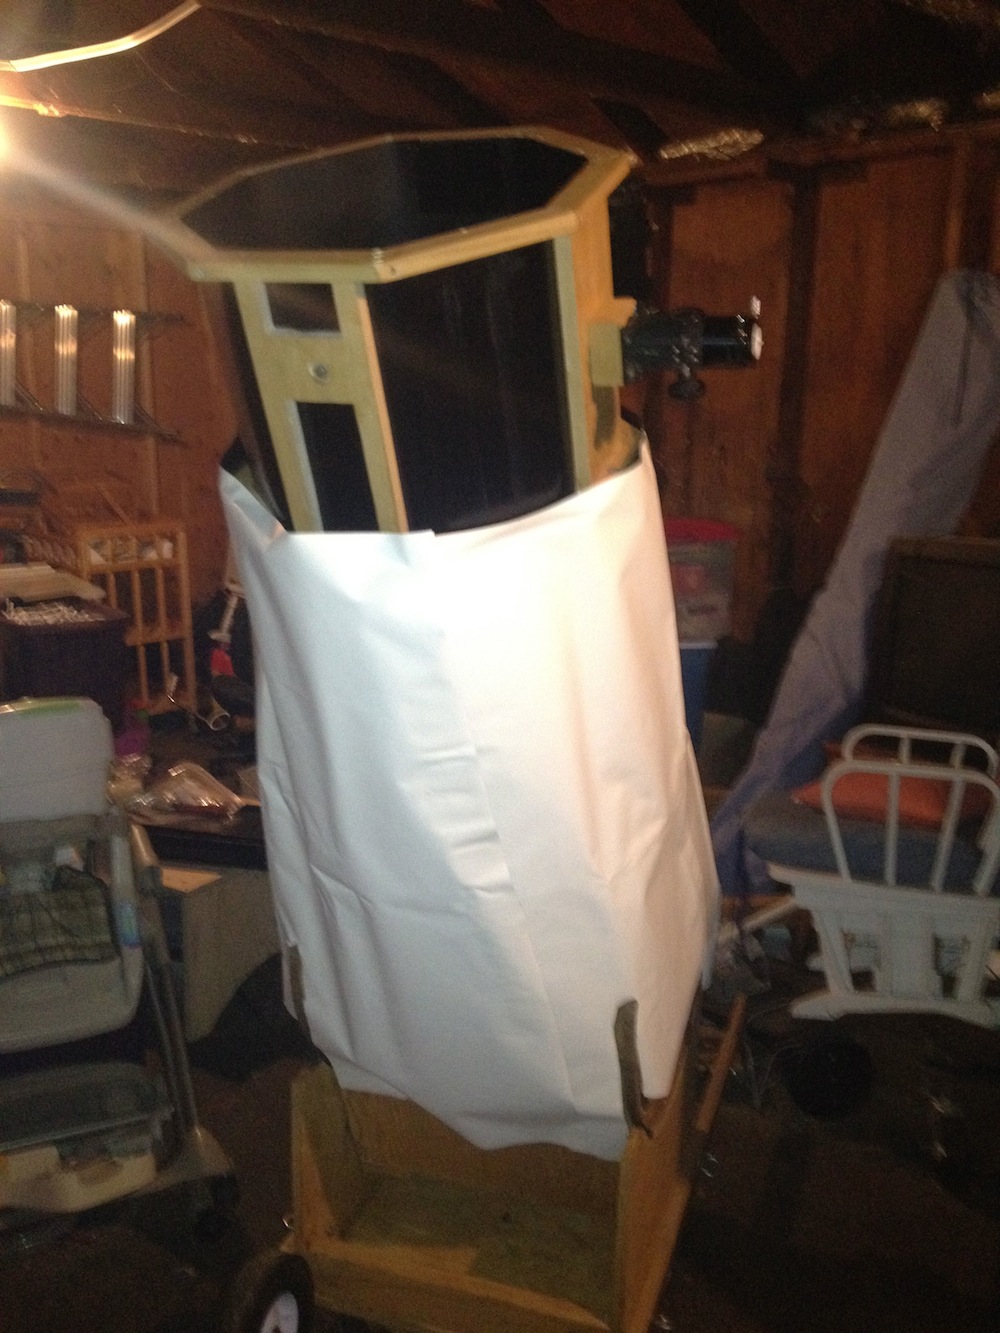
I wanted a light shroud for it as well, but I don’t know how to sew. Fortunately my mom does, and she was nice enough to make the light shroud for me. If you can get your mother to make a light shroud for you, I wholeheartedly recommend it.
The Future
This still isn’t done, of course. I’ve been strongly thinking about rebuilding this telescope again to be even easier to assemble, disassemble, carry around, and use, and now that I’ve done it once I have a bunch of ideas to make it better. If I do it again, I would:
- Make a Crayford focuser and use that.
- Figure out the focal length better so the focuser doesn’t stick out so much.
- Compare Teflon and HDPE, to see if using actual Teflon would make it smoother to use.
- Being able to fit it in my car without putting the seats down would be really awesome.
- A nicer, lighter UTA would be very nice as well.
- I’d probably leave the finder scope off, because I rarely use it, and stick to the Telrad.
- Document the process better.
Doing all that would be a pretty big project, but it would be nice for a lot of reasons. I’ve also been thinking about building a smallish refractor, so I may do that first, or do both of these projects at the same time. After all, this Dob is perfectly usable, it just could be better.
comments powered by Disqus